

Our in-house designers are in charge of taking our beautiful newsletter photos. They work hard around the clock to ensure our pictures are of the highest quality.
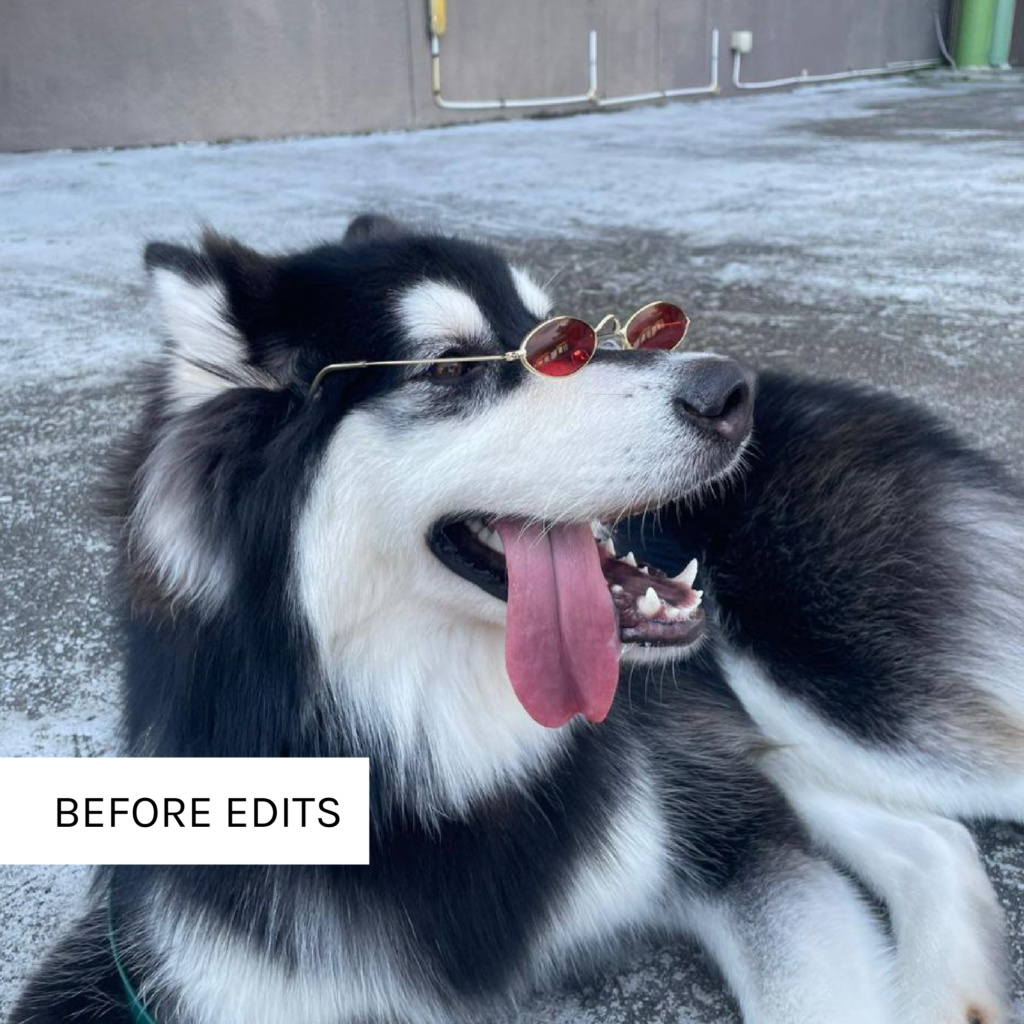
Taking photos outdoors, or of your pet can be a tricky one. We don’t have the liberty of knowing when the sun will rise, or if your pet will stay still throughout the duration of the photoshoot. Check out their tips on photo editing that are guaranteed to help you achieve the best photos possible.
Let us know in the comments if any of these helped!
Designer Tip!: You don’t have to use professional paid programs or have the know-how of a photographer to get nice photos. Simply use free apps like VSCO and tweak the adjustments accordingly to make your grid have a consistent look.
1. Crop for Better Composition
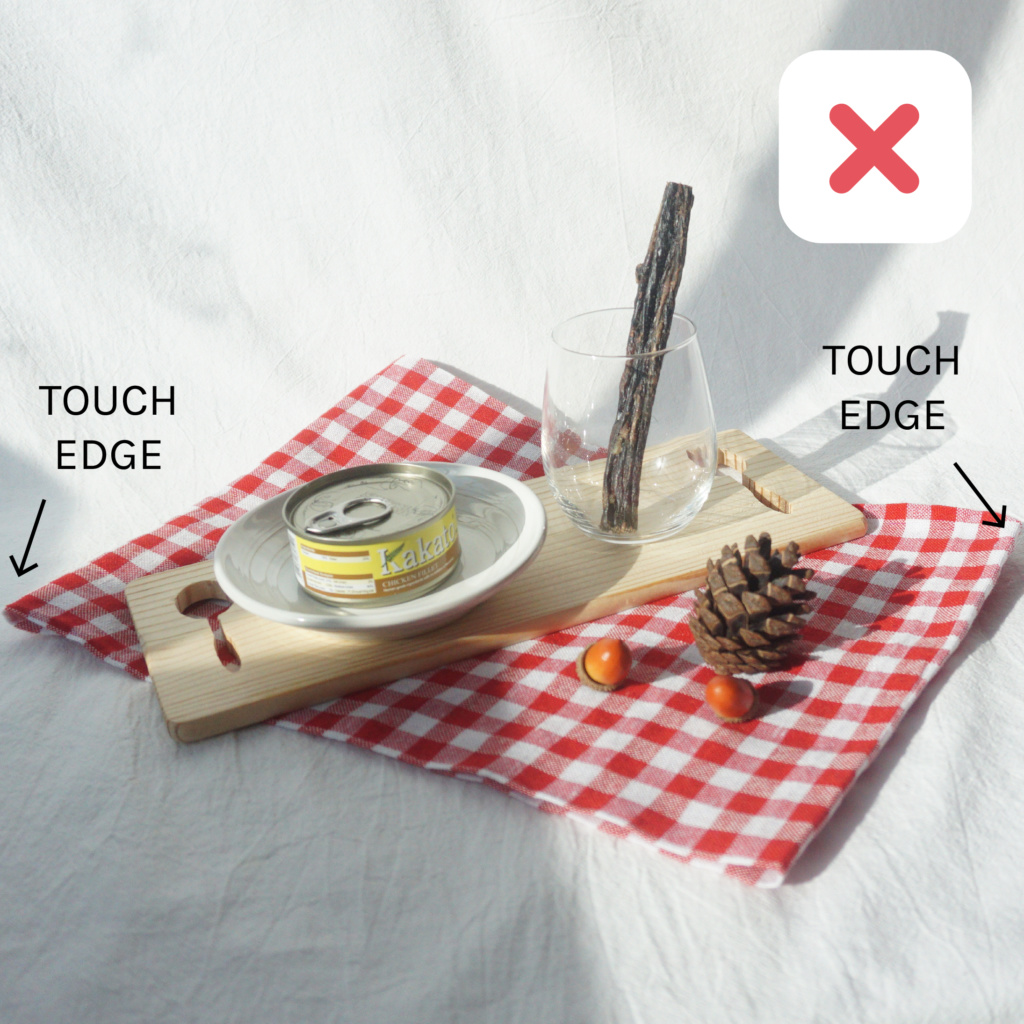
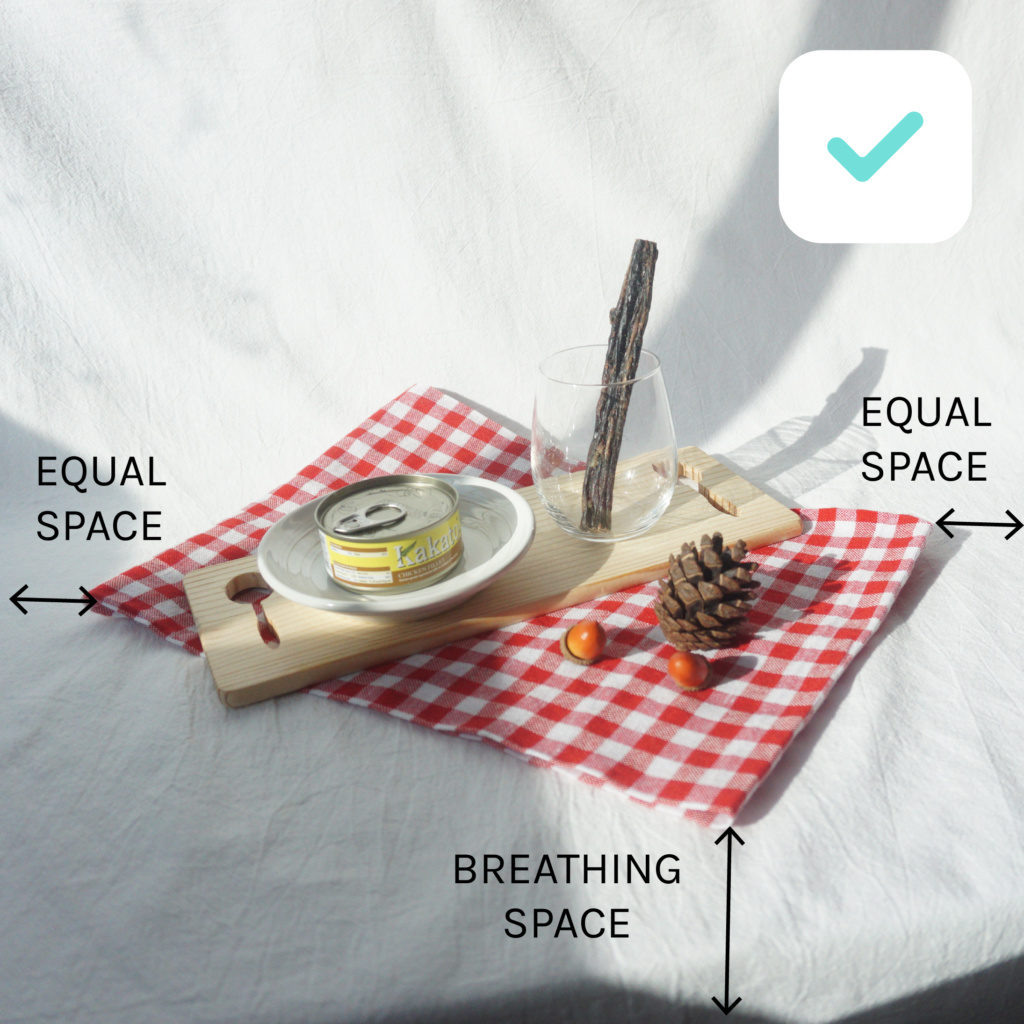
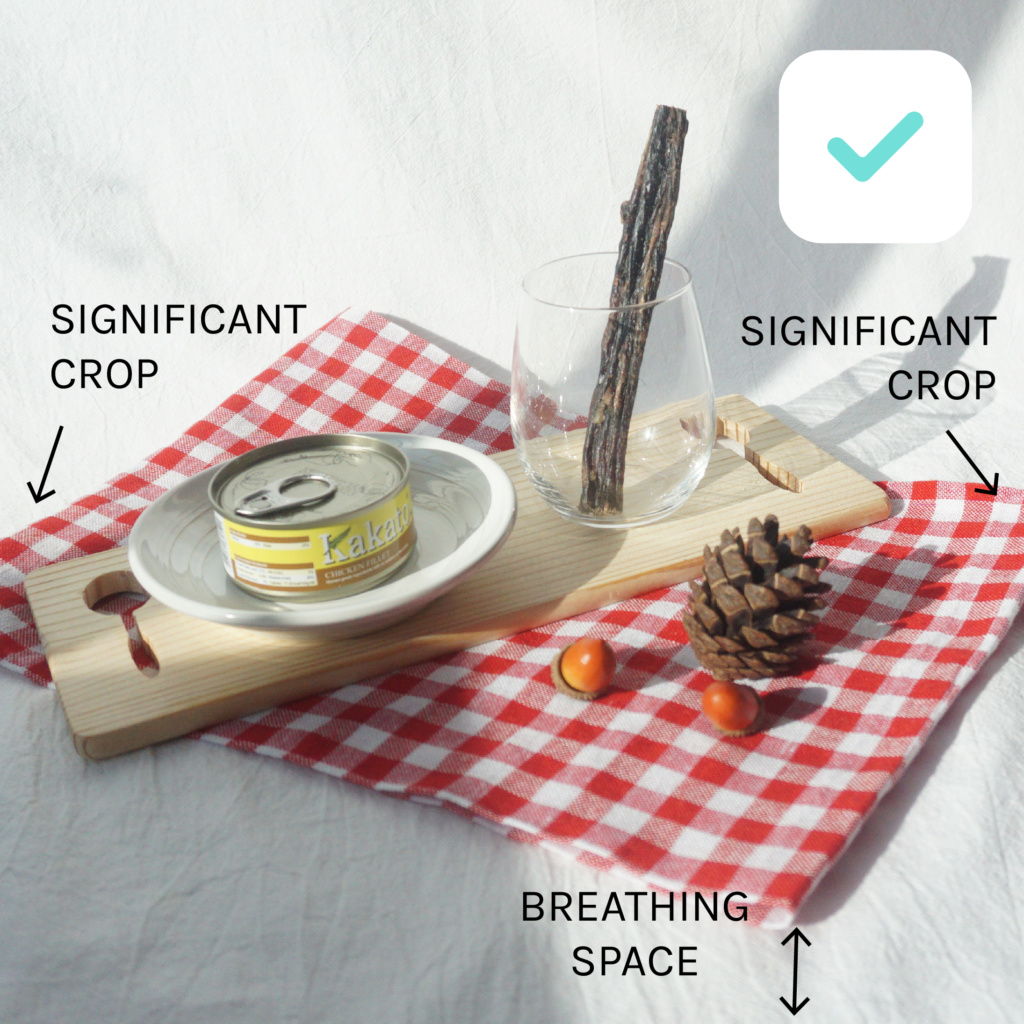
It is always a good habit to crop images to improve photo composition. Follow the rule of thirds or centralise the subject and ensure that there is an even amount of breathing space around the edges.
Cropping can also come in handy to remove any unsightly object in the background.
Designer Tip!: As a general rule, avoid cropping right at the edge of an object – either leave some space or crop beyond the edge.
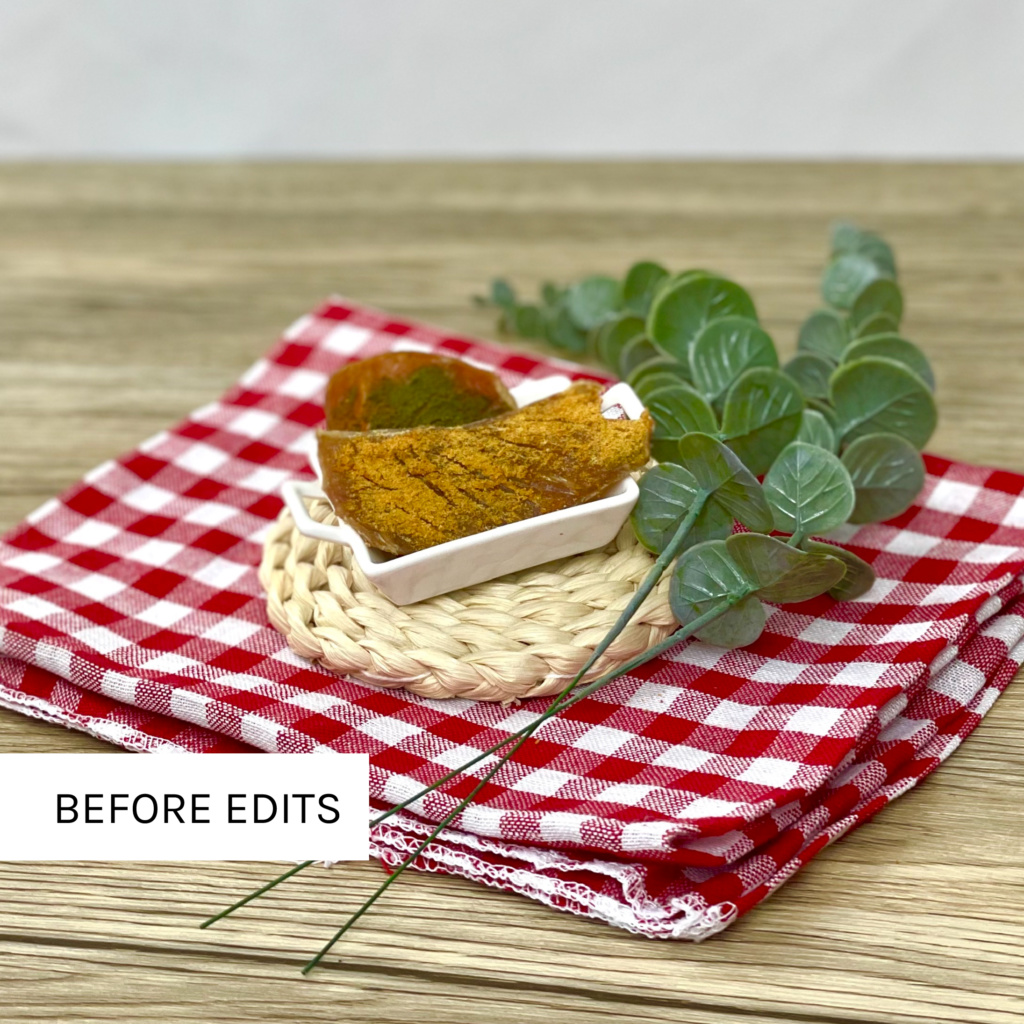
2. Increase Exposure

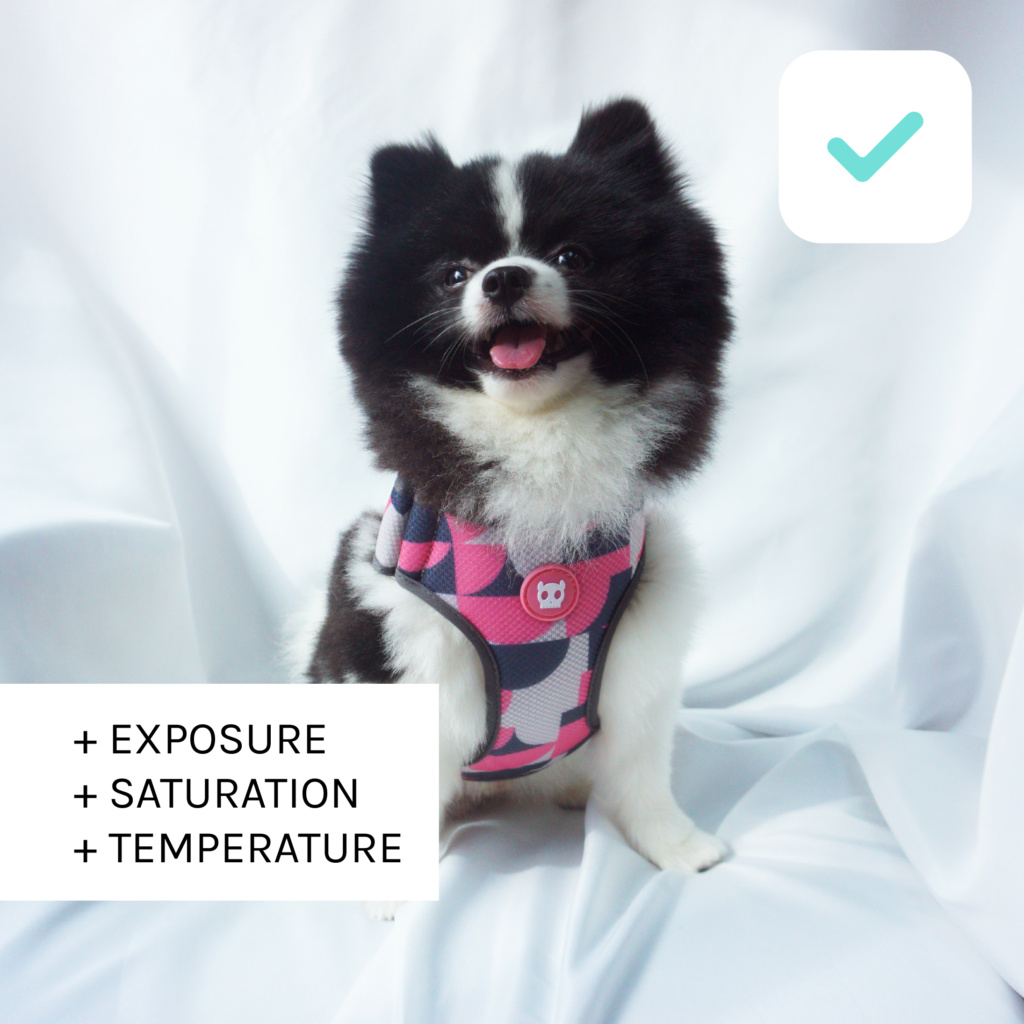
If your picture isn’t taken under direct, maximum sunlight, chances are that you will need to brighten it. For a better sense of how bright it needs to be, visualise it against your social media feed. Imagine it placed against a white background and determine if it looks dull in comparison.
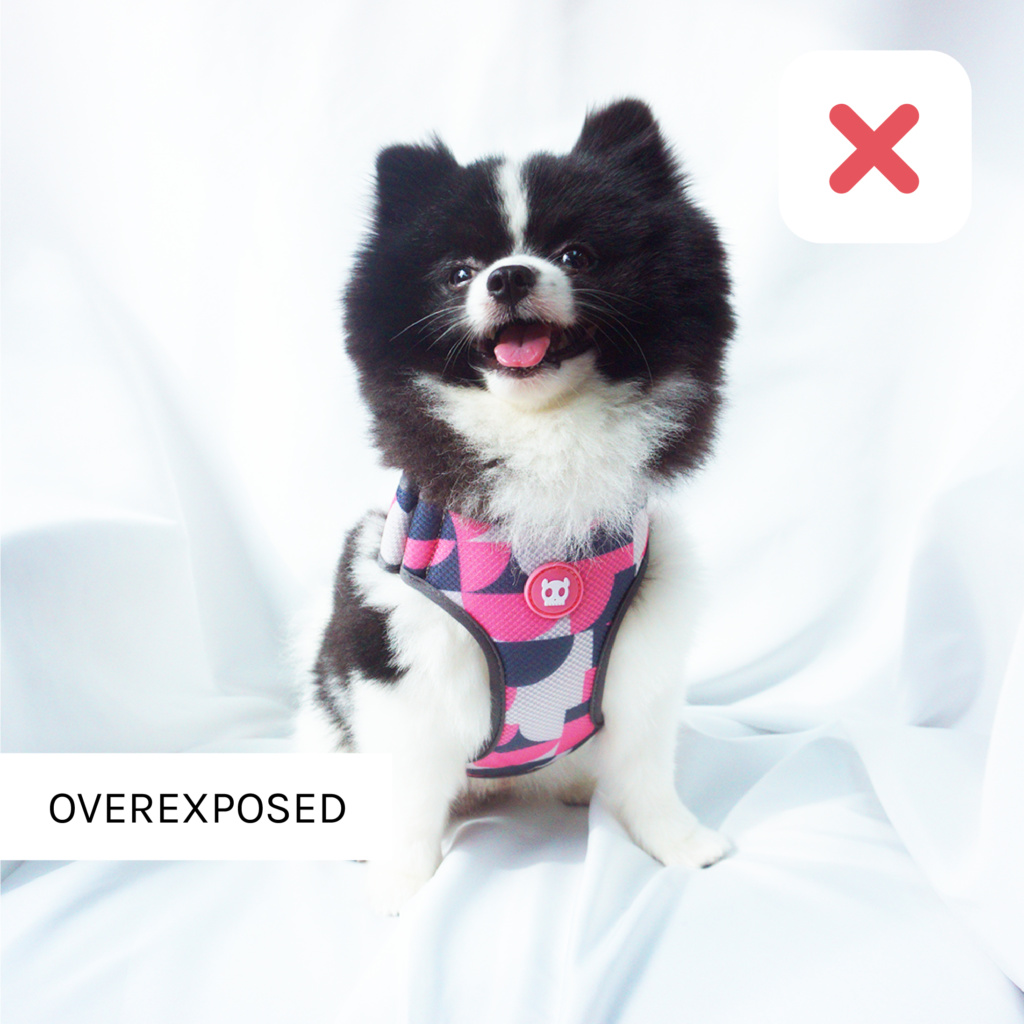
Designer Tip!: Do note that if more than 10% of the picture is pure white, increasing the image’s exposure may result in it appearing too bright, a.k.a overexposed.
3. Increase Saturation
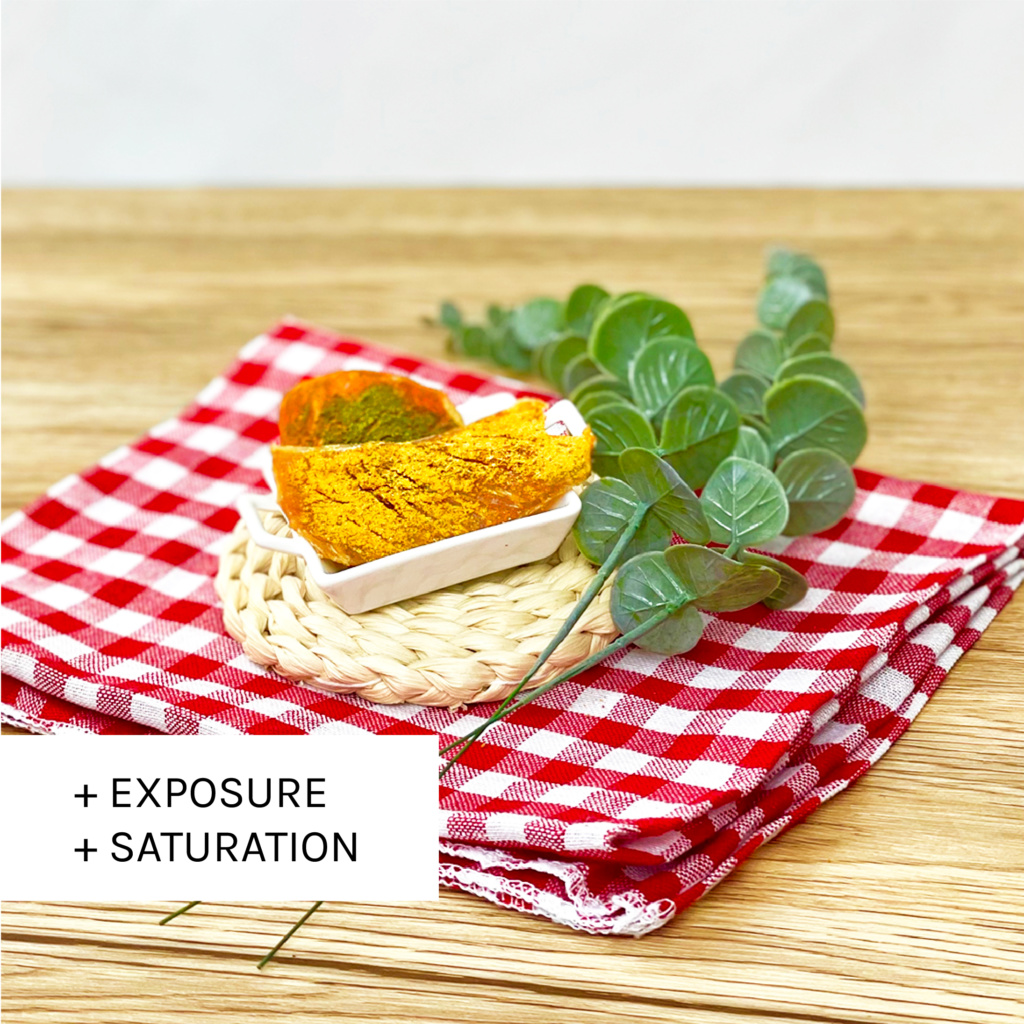
To make your pictures more colourful and bold, it is advisable to increase saturation for that pop of colour. Especially for food-related posts where stronger coloured food can look more appetising.
4. Adjusting Temperature
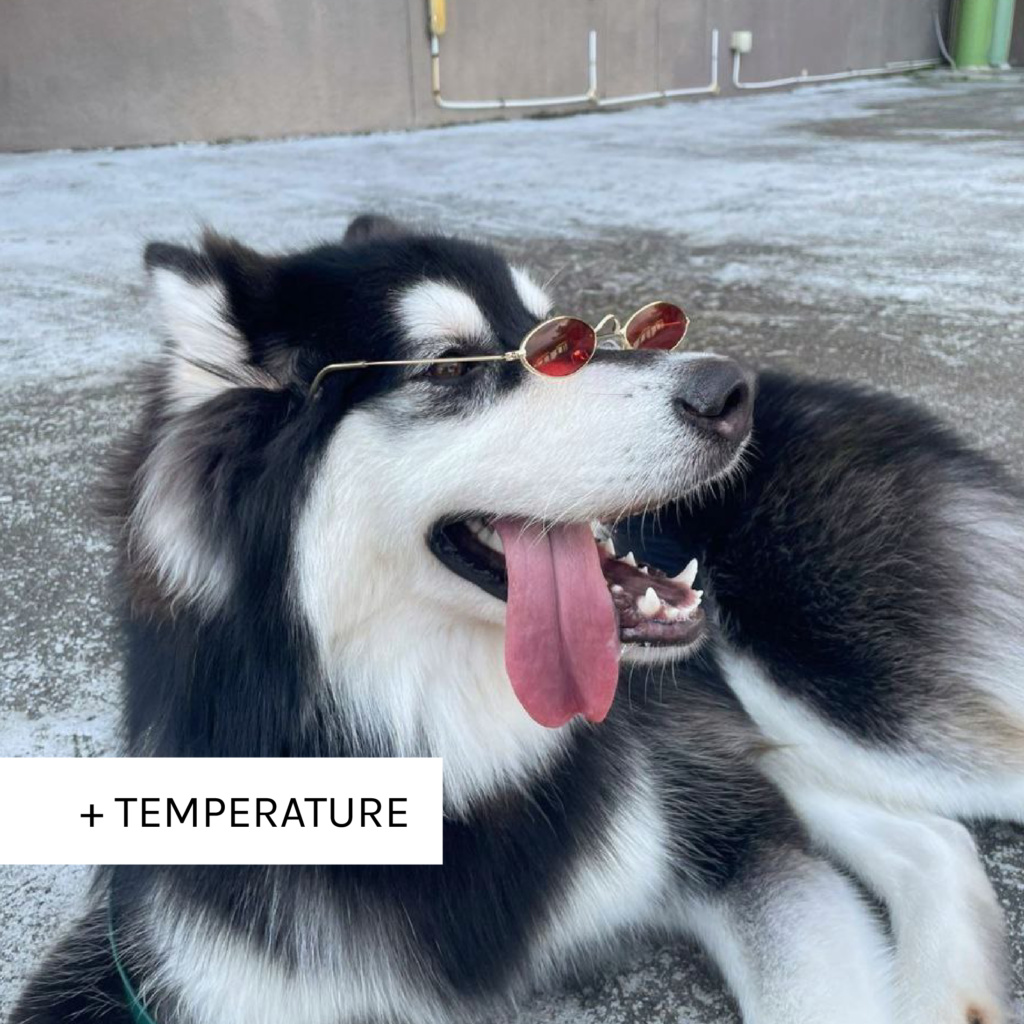
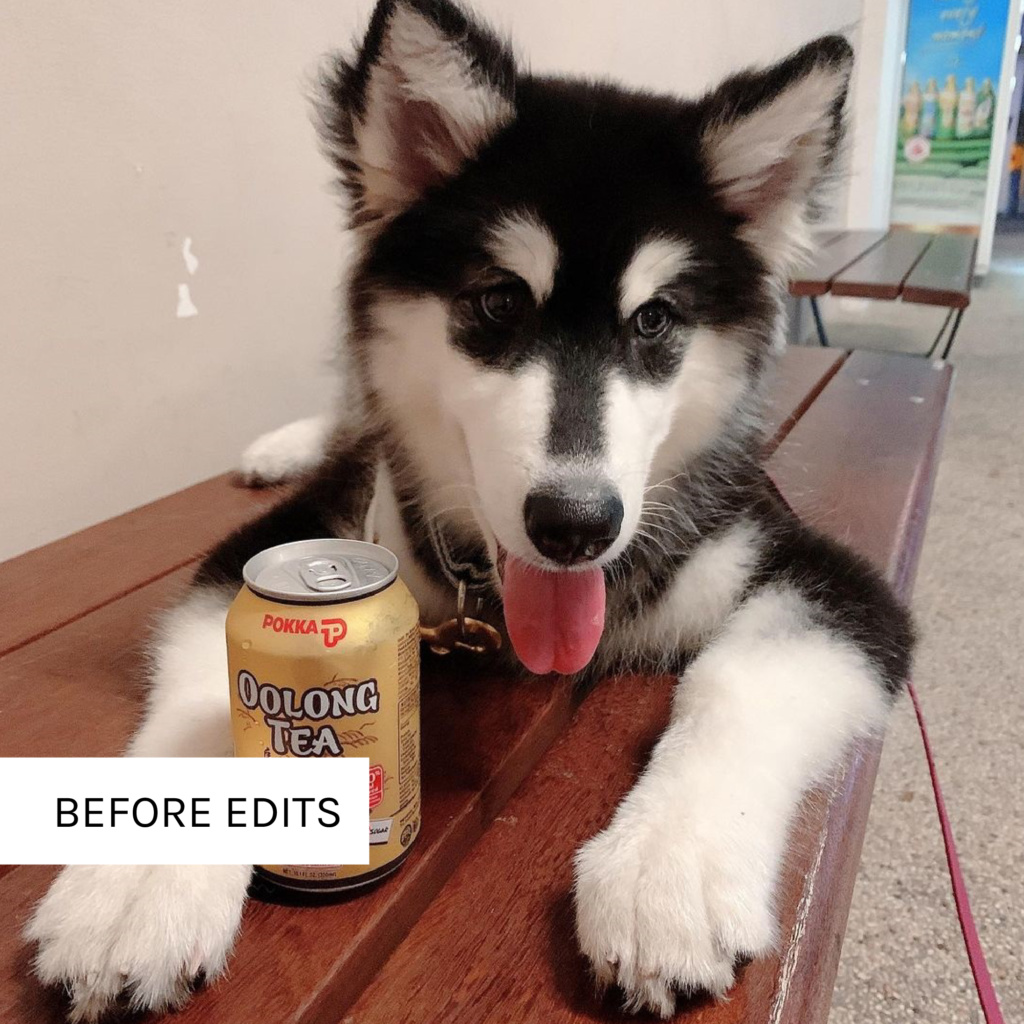
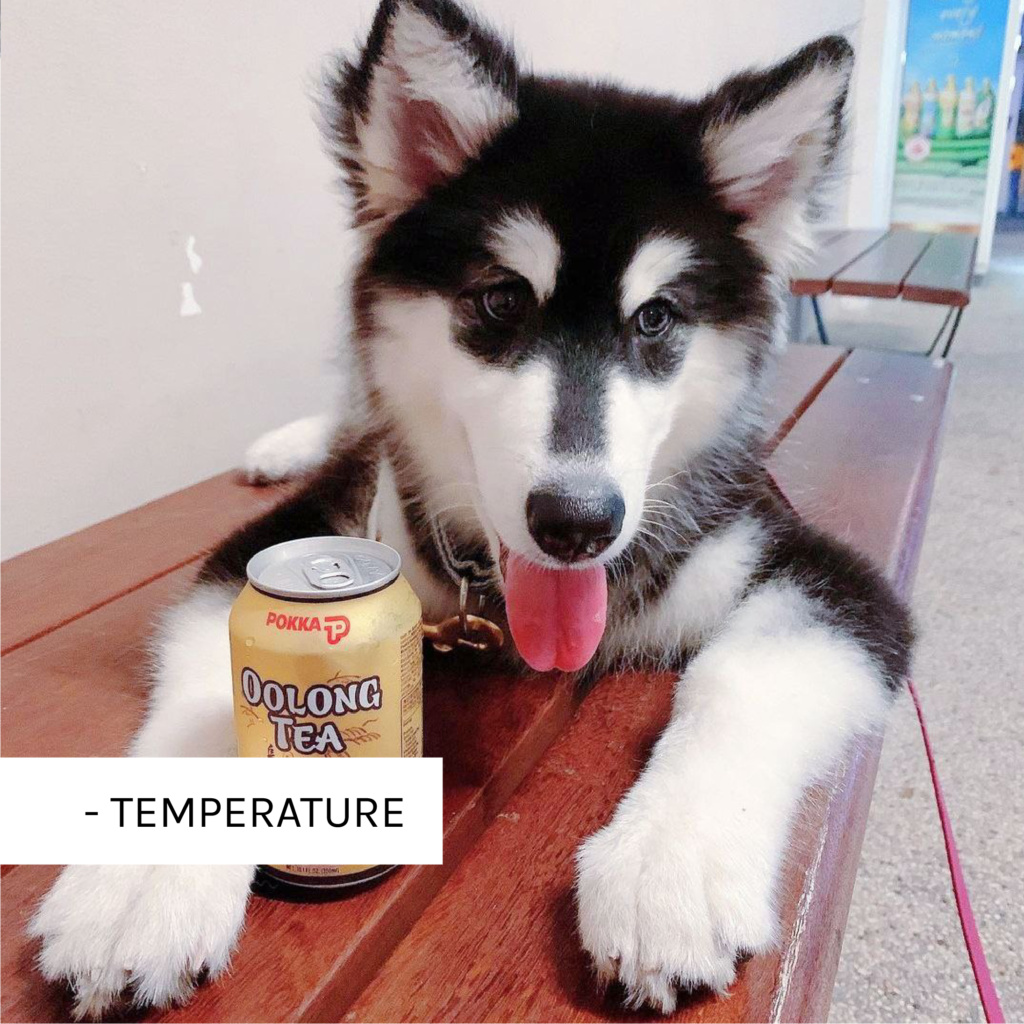
We tend to easily overlook the temperature of a photo. Yet, it is important in maintaining the image’s balance. For example, if the photo is too warm (orange tones) or too cool (blue tones), it may look off-kilter. Simply adjust it back closer to the neutral white tone to provide a clearer and cleaner appearance.
Designer Tip!: Of course, if you prefer having a cool/warm undertone for your photos, you should opt for a preset instead of adjusting the temperature directly.
5. Make Use of Presets
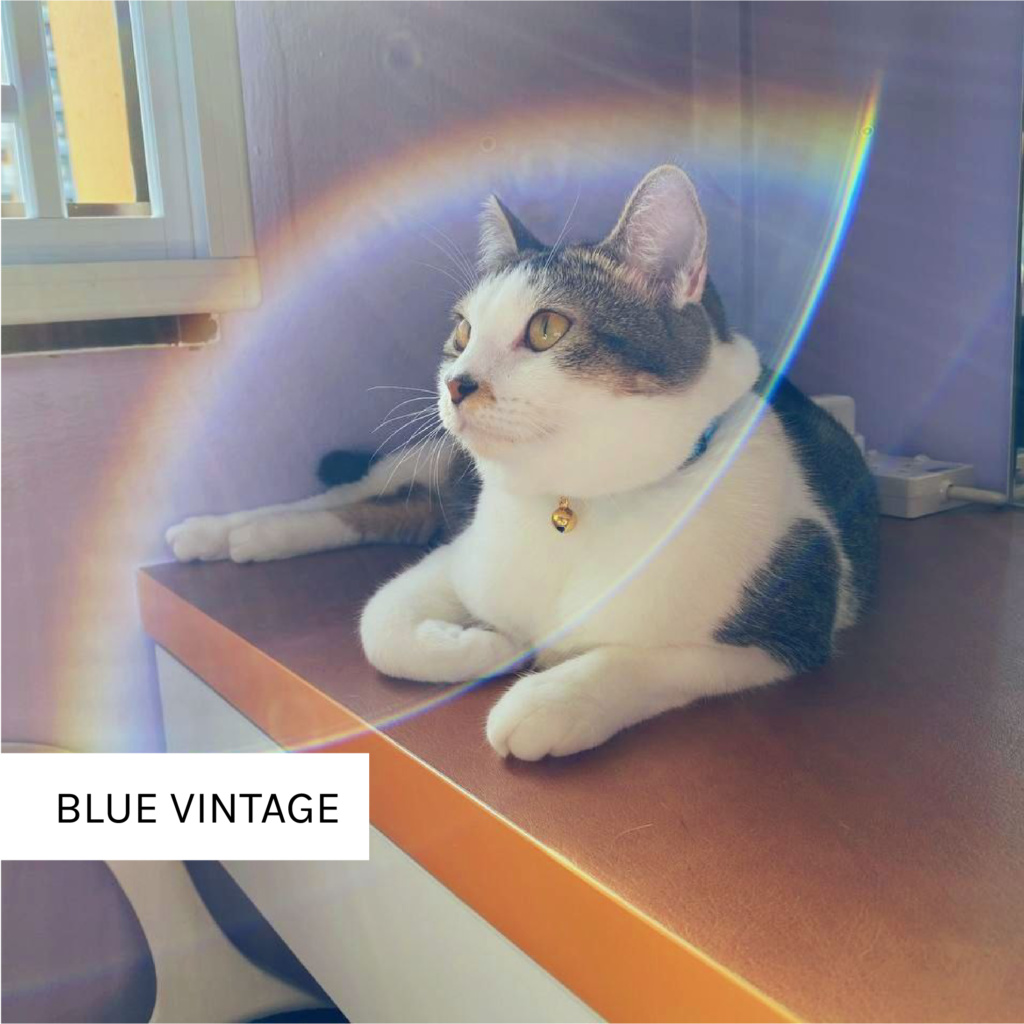
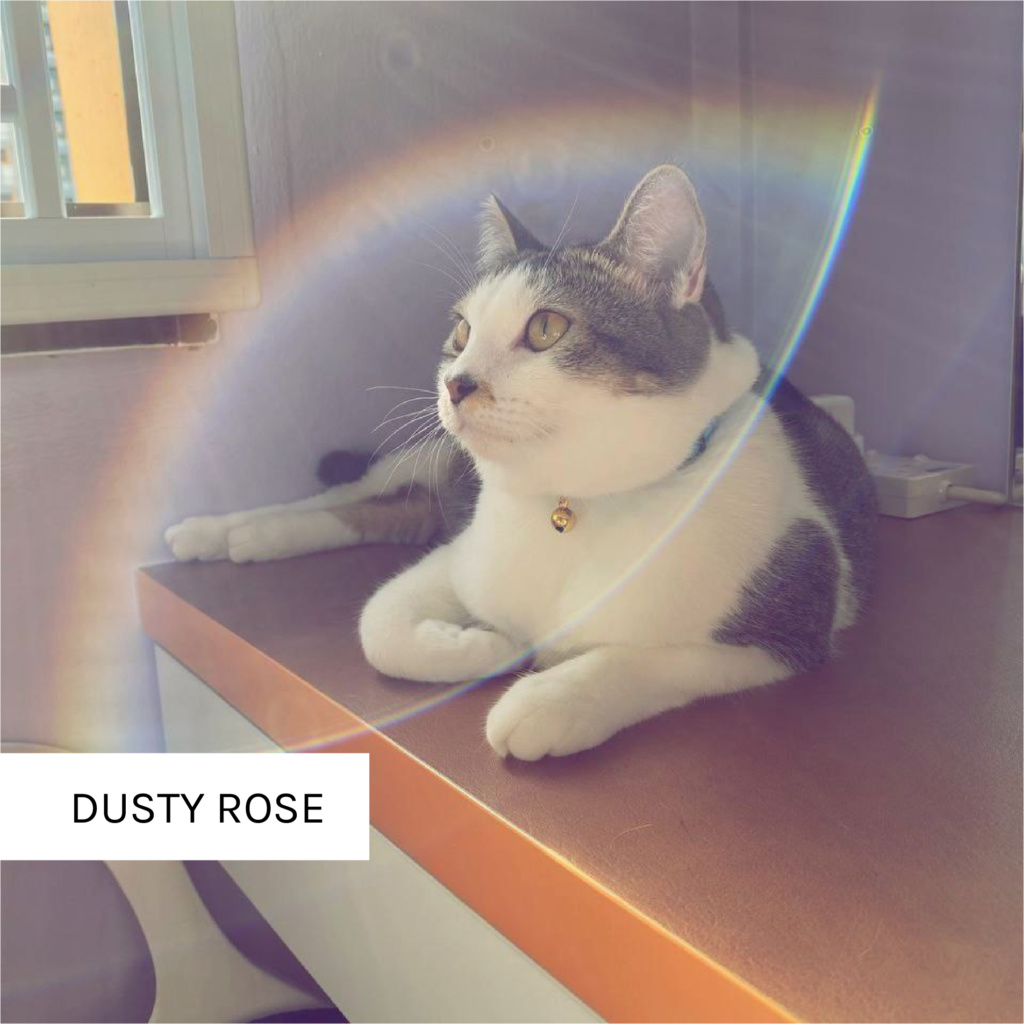
Presets are here to make your life easier. Different presets accentuate different colours in the photo that makes it more aesthetically pleasing – so if you are going for a warmer feel, get the ones that have a rose or orange tinge. Simply browse the few free ones available in the app and see which ones are to your liking.
Designer Tip!: You can also copy pre-loved edits and paste them to your other photos for fuss-free consistent editing!
What do you think? Have you tried any of these tips before on your photos? Let us know if it works, or if they helped you gain a better understanding of how to improve the quality of your photos.
We wish you all the best!
* This blog is designed to be a community where pet owners can learn and share. The views expressed in each post are the opinion of the author and not necessarily endorsed by Pawjourr. Always consult your veterinarian for professional advice.


